Signing Up

Review the Guidelines

Before you get started, we recommend that you review our information about Choosing a Domain Name.

The Sign-Up Process

Once you’ve reviewed the guidelines, you can proceed to the sign-up page.

  1. Click the “Create” button
    Image of Create button on Landing Page
  2. You will be redirected to log in for verification. You will use your Brown username and password to log in.
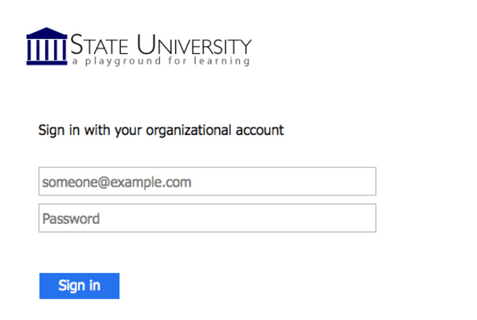
  3. You are now ready to create a domain. To start, you must first sign up for a free subdomain (i.e., yoursite.digitalscholarship.brown.edu). Directions for purchasing a top-level domain (i.e. yourdomain.com) will be provided further down.

Option 1: Free Subdomain (Recommended)

For no cost, you can create a subdomain of digitalscholarship.brown.edu. This is the recommended way to proceed.

To create a free subdomain of digitalscholarship.brown.edu, leave this default option selected and enter the subdomain name you have chosen for your web presence. When you’ve found an available subdomain, click the  Continue button. For example, if you choose “yourdomain” as your subdomain, your full domain would be yourdomain.digitalscholarship.brown.edu.

Confirm that you like the name you selected. If you do, click the Sign Up button. (If not, click the Start Over button, and repeat the above step.)

You should now see a screen confirming that your subdomain is ready. After a few seconds, you will see the regular cPanel options.

Option 2: Buy a Top-Level Domain from Reclaim Hosting

It is easy to create your own top-level domain (a .com, .net or .org address). This allows you to select a URL for your website that is easy to remember and share.

While you are at Brown University, this is available for a nominal cost (currently $15/year). You can continue to use this domain after leaving Brown, although the cost may increase.

To register a top-level domain, log into your newly created cPanel, navigate to the Domains section, and click Register Top-Level Domain.
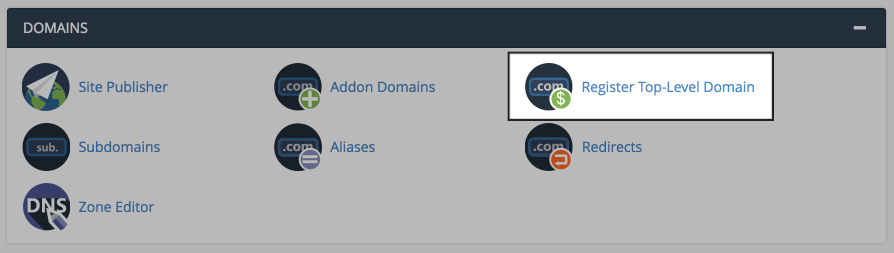
This panel offers a step-by-step guide to registering and adding a new top-level domain to your cPanel account.

Option 3: Connect an Existing Domain to Your cPanel

If you already have an existing domain that you’ve previously registered elsewhere, simply point your domain’s nameservers to ns1.reclaimhosting.com and ns2.reclaimhosting.com.

Understanding Accounts & Passwords

One aspect of this web hosting world that users may find complicated are the different accounts (and associated passwords) that you can manage as part of your participation. This section outlines the types of accounts that you are likely to have, what they are for, and how you go about resetting passwords on each of them.

Your cPanel Account

When you first sign up for your domain and hosting, a cPanel account will be generated that provides you with access to your slice of the web server. Your cPanel account is automatically associated with your Brown username and password. Therefore, your Brown username and password will grant you access to your cPanel account.

Your Application Administrator Accounts

Every time you install a new application in cPanel, an Administrator Account for that application will be created. You will likely use these accounts very often – every time you need to log in to your application to manage the associated website, you will use this account.

For example, if you install WordPress to manage your website, every time you need to add content to WordPress, change your theme, approve comments, etc., you will use this account to log in.

Usually, you will be given the opportunity to choose the username and password for that account. We recommend choosing something that you are likely to remember but that is strong and secure. Do not use your Brown username and password for these applications.

Upon installation, you will likely receive an email confirming the username/password combination you chose. It will also have information about how to access the login page for that application. It’s a good idea to keep this message.

Depending on the application you’re working with, managing and resetting the password for this account will vary. If you’ve used Installatron (in cPanel) to install the application, however, you can always review the account credentials:

  • Log in to cPanel
  • Find the application you installed under My Applications.
  • Click the Edit button (this looks like a blue wrench).
  • Scroll down to find the Administrator Username and Password.

In addition, most applications should have some kind of password reset link on the login page. For more information on resetting your application password through Installatron, click here.

Other Types of Accounts

In addition to the account types outlined above, there are a few other kinds of accounts you may have as part of this project:

  • When you sign up for a subdomain/top-level domain, cPanel will automatically create an FTP (File Transfer Protocol) account for you by default. FTP is a fast and convenient was to transfer large files online. You’ll also have the option of manually creating your own FTP account.
  • Application User Accounts: In addition to the Administrator Account that you set up when installing an application, most applications will also let you set up user profile accounts within each application.

Privacy

What you add to your webspace rests entirely with you (within Brown University policies as outlined in the Guidelines for use). You can choose not to pick a domain that reveals your name. You can use a pseudonym on your actual site. However, when you sign up through the default process, your name does get published as part of the public record about your domain name. Anyone can find it by looking up details about the ownership of that domain name through a public “Whois” request.

This is NOT an issue if you’re already planning on using your name openly on your site (in your domain name or elsewhere). This option is aimed at those who, for whatever reason, feel they want to take every precaution to hide their identity on their site.

What Can You Do with Your Account?

Your ability to do things on this webspace is dictated to a large degree by the limits of your imagination (and Brown’s policies). That said, there are some technical requirements and limitations that you should review.

Here are some ideas that might help you get started:

Install a Web Application in Your Space

This hosting space makes it very simple to install certain web applications in your cPanel account. Web applications are just special software that run on a web server. Usually, they allow you to build and manage a website. The kind of site you can build depends on the type of application you install. Here are some examples of applications that you can easily install within the digitalscholarship.brown.edu web hosting interface:

WordPress: WordPress is a simple-to-use blogging application. The tool also comes with a huge array of plugins and themes to allow you to create virtually any kind of website imaginable.

""

Omeka: Omeka is an open source web application that can be used to create and display online digital collections and archives.

Scalar: Scalar is a content management system (CMS) that enables the creation of media-rich, non-linear, digital books.

Grav: Grav is an open source, flat-file CMS made for folks who are looking for something a little more experimental. Grav provides a straightforward framework for creating pages and inserting media.

Mediawiki: It is the open-source wiki software that runs the online encyclopedia, Wikipedia. This tool may be right for you if you’re interested in publishing documents and then collaborating with others on them.

These are just a few of the open-source applications that are available to you in your hosting space. We encourage you to read more about what web applications are and which ones are available to you through this project. Digital Scholarship at Brown provides shell access, and it is possible to install some other software, but this is not a bare server like AWS or Digital Ocean. Please discuss this with CDS staff before trying it. cds_info@brown.edu

Organize Your Site with Subdomains and Folders

Through this project, you’ve received a domain name that you can actually subdivide and organize anyway you like. One easy way to organize your domain is to create subdomains, in which you can then install other applications. More simply, you can set up subfolders for your site (which can also have their own applications installed in them). The table below provides examples of how you might organize your site using the subdomain vs. the subfolder approach.

Subdomain Approach Subfolder Approach
yourdomain.com (“root”) Install WordPress as your “main site” yourdomain.com (“root”)
course1.yourdomain.com Install a second WordPress instance for a course you’re taking. yourdomain.com/course1
photos.yourdomain.com Install ZenPhoto for a public photo gallery of your photos. yourdomain.com/photos
docs.yourdomain.com Install MediaWiki for a club you belong to that wants to collaboratively edit its bylaws. yourdomain.com/docs
files.yourdomain.com Install OwnCloud so you can access your files on your laptop and at work. yourdomain.com/files

There is no one solution to this challenge of organizing your installed applications. What you do should be driven by what makes sense to you. To start, you may want to install one thing at the root of your domain, and then let the rest evolve as you learn what’s possible. Note that any subdomain that you create adds a fourth level to the name of your site: subdomain.yourname.digitalscholarship.brown.edu.

Map Your Domain (or a Subdomain)

If you already have a digital presence that you’d like to pull into your hosting space, domain mapping is an option you may wish to explore. This allows you to assign your domain (or a subdomain) to another service. Some services that work with domain mapping are:

When you map a domain, users who visit your URL will automatically see your space on one of these services. It’s a great way to incorporate your activity elsewhere into your domain, and it might be a good first step if you’ve already established a presence somewhere else and just want to point your new domain to that space.

Static and Dynamic Websites

Static Websites

In the early days of the web, almost all web sites were what is known as 'static sites.' Content (text, images, video, audio, etc), was placed or embedded in a file in which HTML tags were used to format it. If you looked at the actual contents of the file, you might see something like this:

The content and the tags lived side-by-side. To edit the page, you’d open up the file (on your own computer) in a program capable of editing HTML files and make changes to either the content or the presentation. Sometimes, each page was edited individually, even if the edits were for common elements that appeared on many pages, like menu bars.

From a technical perspective, accessing a static web site is fairly straightforward. When your computer is connected to the Internet, you can use a web browser to access files on a web server (as long as you know the address). The web server delivers the contents of those files to your browser, and your browser displays them.

Dynamic Websites

Over time, as the web became more sophisticated, new systems emerged for creating and managing web sites. These moved beyond the model of placing content and HTML tags in a single file which the browser accessed and displayed. Instead, these systems were web applications – software that runs on the Web server and manages a web site, often with sophisticated features. One feature of these applications is that they separate content and presentation by storing most content (your text, images, etc.) and data about the site (the title, options, etc.) in a database.

On the web server, the web application installs program files that are written in a programming language. The server reads this code and executes requests to access data in the database (which lives on a separate server) and display it according to the instructions in the code.

The data for the site is stored in a series of tables in a database on a database server, and is entirely separate from the actual presentation of the site, which is determined by the web application. Special software on both the web server and the database server enable the two to communicate and pass information back and forth.

One of the benefits of using a seb application is that you usually don’t need to touch (or even look at!) the code in order to make changes to your content. In addition, editing the site usually involves accessing a control panel through your web browser and filling out a form, instead of having to download and edit files in software on your own computer.

Dynamic vs. Static Content

Sometimes comparisons between dynamic and static content focus on whether or not the content is “fresh” (dynamic, regularly updated) or “old” (static, never updated). How frequently you update your content is unrelated to the kind of system you are using to manage your site. You might manage a static web site (as described above) and update the content every day. You may also have a dynamic web site (running in WordPress, for example) and never change the content after you create it.

Generally speaking, it is easier to regularly update content on a dynamic web site because the web application makes it easier. Sometimes, even when you just want a very basic page or placeholder, it’s easier to install a web application (and only put up a single page) than to manually create an HTML page and upload it.

A Side Note about Separating Content from Presentation: Style Sheets

Another aspect of separating content from presentation involves the use of Cascading Style Sheets (CSS). These are special files that live on your web server and are linked to your web pages. They contain information, written in a special markup language, that defines the appearance of the HTML elements on your pages. For example, they allow you to define in a single location what all Level 1 Headings look like on your site. They are an important aspect of understanding how to separate content from presentation, but they’re also not really an aspect of the difference between static and dynamic sites. Both static and dynamic sites can use style sheets.

LAMP Environments

When you sign up for an account on digitalscholarship.brown.edu, you get a personal space on our web hosting service. There are a few things you need to know about the configuraton of the servers that will make it easier to understand what you can do with your new space.

The Web Server

The web server is the main computer that is associated with the digitalscholarship.brown.edu hosting account. It is literally a computer that has special software on it that allows it to be accessible via the web. The files that run your applications, images, video, or any other files you upload into your Web space are stored on this server.

(For comparison’s sake, your desktop or laptop computer, by default, doesn’t allow this; I can’t access files on your computer through a web browser by default. You can actually install web server software on your own computer, and then make your files accessible over the Web. For security reasons, we don’t recommend this!)

In order to run properly, a web server has to have an operating system installed and some kind of web server software. Our Digital Scholarship at Brown hosting environment runs the LINUX operating system and an APACHE Web server.

The Database Server

In addition to the web server, there is also an associated database server. This is hosted on another computer that is specially configured to host databases. It is also connected to your web server so that the applications  on your server can retrieve data from databases hosted on the database server.

Databases come in many varieties. The kind of database you can use for a Web application depends on the kind of software that’s installed on the database server. Our Digital Scholarship at Brown hosting environment runs mySQL databases.

The Programming Language

When you install open-source software on your web account, it is written in a programming language. Our Digital Scholarship at Brown hosting environment has software installed on it that allows it to understand different programming languages. If you install software that’s written in a language that your web server doesn’t handle, it won’t run.

The Digital Scholarship at Brown hosting environment can currently interpret PHP, PERL and Python.

Add it Together: LAMP

If you take a look at all the descriptions above, you can determine that we are running what is known as a LAMP server for digitalscholarship.brown.edu:

  • Linux (operating system)
  • Apache (web server)
  • MySQL (database server)
  • PHP/PERL/PYTHON (programming language)

Applications that are written for LAMP environments will, presumably, run on the server. However, some applications do require additional extensions or libraries that aren’t included in a LAMP environment by default. The applications you can install via Installatron (in cPanel) should work just fine.

LAMP environments are unique because all components are open-source, meaning Linux, Apache, MySQL, PHP, PERL, and PYTHON are open for anyone to use for free. Anyone can also modify them and redistribute them. As a result, there are lots of online resources for using these systems that have been built by their communities of users. But, also as a result, since you’re not paying for these systems, you can’t just call up a company and ask them to fix a problem.

What are the technical requirements/limitations of digitalscholarship.brown.edu?

Digital Scholarship at Brown uses a web server configured as a LAMP server. “LAMP” is an acronym for the technology stack that is installed on the server:

  • Linux: This is the open-source operating system that is used on the server.
  • Apache: This is the web server software that the server uses.
  • MySQL: This is the database software that the server uses.
  • Php/Perl/Python: These are the three programming languages that the server can interpret.

Generally, if you are using applications available to install by default through digitalscholarship.brown.edu, you won’t need to worry about these technical details. All of the software that is available for installation in cPanel meets the technical requirements.

If you would like to install an application that isn’t available through our automatic installer tool, then you’ll have to be determine if the server can support it. First, check the technical requirements for the application to determine if it can run on a LAMP server.

Your space at digitalscholarship.brown.edu should come with AT LEAST the following versions of the LAMP components, which can help you determine if an unsupported application you want to add to your domain might be compatible:

Linux: CentOS 7 with linux kernel 3.10.0-957.21.3.el7.x86_64
Apache: 2.4.46
MySQL: 5.7.31
PHP: 7.2.33
Perl: 5.16.3
Python: 2.7.5

You should also do some research to see if there are additional services or modules that need to be installed on the server. Some software may require components that aren’t included in the default installation of the LAMP stack. In that case, contact us with details about what you need, and we’ll see what we can do.

Social Media

As you begin to build out your digital presence you’ll probably start to think about social media in some form. In fact it’s likely that you already have at least one, if not more, social media accounts (Facebook being the most popular to date). Everyone uses social media in different ways, and although it’s often interesting to see people break the boundaries of the “social norms” of a specific online community, this article will focus more on the accepted use cases for specific social networks and how they can help you build your digital presence. This is by no means a comprehensive “How To” guide for Twitter or Facebook, but a good starting point for thinking about where you best fit into these online communities.

Facebook

The majority of folks that will read this likely have a Facebook account. With over 2 billion active users it’s by far one of the more popular social networks. Many treat Facebook as a semi-personal space, one reserved for family and friends to share photos and highlights of what’s happening in their lives. Facebook also supports “Groups” for sharing amongst a smaller set of individuals regularly, and “Pages” which are less personal and more public-facing profiles meant for organizations and businesses. There are plenty of applications that make it easy to publish a link to the work you do on your blog and your participation in other networks back into your Facebook profile.

In general, it’s a good practice and can often lead to interesting conversations with different groups of folks. This practice of publishing elsewhere and then feeding into Facebook is desired over the alternative, using Facebook for all content and then pushing it out to other communities. The main reason for this is that privacy concerns over how different people can view content on Facebook have changed often enough to leave users concerned. There’s also never any certainty of sustainability with any of these social networks (remember MySpace or Friendster?) no matter how popular, so publishing in your own space and then pushing out to others makes a lot of sense. The key takeaway is that Facebook is a great personal network and can also be the starting point for some of these larger professional discussions should you decide to use it that way.

Twitter

While no longer the new kid on the block, Twitter has only relatively recently started to gain momentum. It doesn’t have nearly the same user base as Facebook (though there are about 500 million accounts to date) and the way people use it is very different. Twitter has focused on the short status message from the start, before Facebook even integrated the idea into their platform. Users are limited to 280 characters. It’s a conversational platform for interacting with people. It’s used heavily at conferences and many choose this as a social network for really networking with peers and others in their community as well as people they might not ever meet in real life. You can follow as many people as you want and it’s a great way of having a stream of information about “what’s happening” with people and groups you’re interested in.

One powerful development of Twitter is that celebrities have begun to embrace it as a way to speak directly to their fans without having the message interpreted through other media and journalism with a slant. The ability to search various topics or hashtags (keywords) and see a running stream of what people are saying about that topic is also a very powerful way of gauging reaction to ideas and events. It’s a great idea to experiment with a Twitter account by signing up, adding a profile picture and information about yourself, following a group of people, and interacting with it daily. While the gratification may not be immediate, it’s one of those social networks where the more you put into it the more you will get out of it.

LinkedIn

LinkedIn is the professional resumé of social networks. It mixes the ability to keep an updated resume of where you work and what your accomplishments are with a social aspect of having people recommend you and comment on your work. Most users find LinkedIn helpful not as a day-to-day network they use, but rather when they’re searching for a new job and want to find people they know that might have connections. The old saying “It’s who you know” when finding a job or making a connection is particularly relevant here where those connections can be exposed to you. (For instance: you may know a person who works for the company of one of Bill Gate’s sons, and the VP went to high school with you).

Summary

As mentioned in the opening paragraph, talking about social media is an ever-changing and moving target and this article can never be truly comprehensive. The goal of Brown University is to have you thinking more critically about where you put your content, not that you don’t participate in these networks which still have a lot of value, but rather that you own the work you create. Facebook, Twitter, LinkedIn, and others all have different audiences and the more places you push your content to, the more opportunities for discussion and feedback you’ll receive. The ability to network with an increased amount of people that isn’t reliant on face-to-face meetings is a powerful change in how we interact on the web and the value of it. As you begin to explore social media the best recommendation would be to choose a space you want to explore and really dive in. Follow as many people as possible, engage with them, respond to their work, and you’re more likely to get responses in return that start to build that sense of community for you.

Registering a Domain

This web hosting space currently utilizes both subdomains of digitalscholarship.brown.edu and top-level domains (a .com, .net, .org address) after initial sign up. You have the option to start with a free subdomain and later purchase a top-level domain after using the space.  You can do this by registering a domain with a service provider (we make a recommendation below, but any domain service provider should work) and adding it to your space as an Addon Domain.

To start, you’ll need to register the domain. When choosing a domain we recommend keeping it all lower case, avoiding hyphens, keeping it short, and, of course, it will need to be a unique address. Reclaim Hosting has made the process of registering a domain quite simple, and the domain will work with very few additional steps due to the integration they have with our hosting system. To register a domain, click here and type in the domain you’d like to purchase.

screenshot of domain registration at reclaim.com

After ensuring the domain is available for purchase, you’ll be prompted to select whether you’d like to protect the contact information associated with the domain. This option (referred to as ID Protect) is free to add. We recommend checking this ID Protect box to protect your contact information.

You’ll also be prompted for nameservers for the domain. If registering the domain through Reclaim Hosting, you can leave these with the default. If you decide to register the domain elsewhere, you’ll want to point the nameservers to ns1.reclaimhosting.com and ns2.reclaimhosting.com in order for the domain to work with our system.

Once you’ve completed the checkout process with payment information, the domain will be registered automatically.

The last step is to connect it to your existing cPanel hosting account. To do that, navigate to your cPanel > Domains > Add-on Domains.

On the following page, type your newly purchased domain in the New Domain Name field. (The Subdomain and Document Root fields will populate automatically.)

You can change the document root (the directory of your files) if you wish. Some folks like to remove the “.com” from the Document Root field for convenience when using FTP. The option to create an additional FTP account is present but not necessary. Once the domain is entered, click Add Domain to add the domain to your hosting account.

At this point, the domain will now be hosted in your account and you can use it to install applications, upload files, and perform any number of other actions available to you in cPanel.

Installing Applications with Installatron

Installatron is a script installer that allows you to quickly and easily install web applications on your web space. By default, when you use Installatron, the application you add will be automatically upgraded whenever a new version is available (and a backup will be kept, just in case).

Installing Applications Using Installatron

To get started, you’ll need to log in to your cPanel (control panel) by going to https://digitalscholarship.brown.edu/dashboard/.

  1. On the Digital Scholarship at Brown home page, log in with your Brown username and password.
  2. Once logged in, you’ll be on the homepage of your control panel (cPanel). You will need to scroll down until you see a section of your cPanel labeled Web Applications. Within this section, you will see a link to the Installatron which you should click. Or, you can type “installatron” (without quotes) into the search bar. When you press enter you will automatically be redirected to the Installatron page.
  3. A listing of all of the applications you can install by default in Installatron will appear. Navigate to the one you want to install, and click the icon.
  4. After clicking the icon, a page will appear with information about the application, links to resources, and a link to install it.
  5. Click install this application when you are ready.
  6. A page will appear with a number of settings you can choose/change. The image below shows these settings; here is a rundown of them:
    • Location: You’ll need to choose where to install your new application. You can install it at the root of your domain or in a subdomain (which you need to set up first). In addition, you can place your application in a folder (in either your root domain or a subdomain).
    • Version Information: You can choose a version of the application. Generally, we recommend choosing the default version. It is likely to be the most recent, stable release.
    • Updates & Database Management: By default, the system is set up to automatically upgrade (and create backups upon upgrading) all applications. In addition, by default, the database will be set up for you automatically. We recommend NOT changing these options.
    • Username/Password: A username/password will be automatically generated for you. You can choose to change this if you like.
    • Click Install: After installation, you’ll be taken back to the main Installatron page, with details about the application you just installed. You can come back here at any time to review the application details, back it up manually, or uninstall it.

To get to your new site, you can click the “website” link. What’s more, with certain applications, you can use this space to log in to the the applications admin page.

In addition, you’ll have received an email with your username/password and a link to your new site.